In this example we will use the Integration Composer to get CMDB data out from TADDM and populate that data into Control Desk’s CMDB. We are basically setting up data translation between TADDM and Control Desk’s CMDB.
We will have the following steps:
- Create data source for TADDM CIType ( Configuration Item )
- Create data source for TADDM Actual CI ( Configuration Item )
- Create target data source for Control Desk CIType ( Configuration Item )
- Create target data source for Control Desk Actual CI ( Configuration Item )
- Create mappings between TADDM CIType and Control Desk CIType
- Create mapping between TADDM Actual CI and TADDM Actual CI
- Run executeMapping.sh on the CIType mapping to populate the Control Desk CIType database
- Activate CIs Types on Control Desk
- Run executeMapping.sh on the Actual CI mapping to populate the Control Desk Actual CI database
Before we start the procedure we will copy the taddm api files to the ./lib directory in the Integration Composer root directory.
scp platform-model.jar root@huctrldsk001-p1:/app/IBM/Integration_Composer/lib/
Password:
platform-model.jar 100% 16MB 16.2MB/s 00:00
scp taddm-api-client.jar root@huctrldsk001-p1:/app/IBM/Integration_Composer/lib/
Password:
taddm-api-client.jar
100% 117MB 39.1MB/s 00:03
Password:
platform-model.jar 100% 16MB 16.2MB/s 00:00
scp taddm-api-client.jar root@huctrldsk001-p1:/app/IBM/Integration_Composer/lib/
Password:
taddm-api-client.jar
100% 117MB 39.1MB/s 00:03
Make sure that the JAVA_PATH variable is set correctly in the init.sh file. We used the java version that comes with the Control Desk installation.
# ===============
# SPECIFY THE JDK
# ===============
JAVA_HOME=/app/IBM/SMP/sdk/
# SPECIFY THE JDK
# ===============
JAVA_HOME=/app/IBM/SMP/sdk/
Start the Integration Composer using the startFusion.sh command from ./bin directory of your Integration composer installation root.
HUCTRLDSK001-P1:/app/IBM/Integration_Composer/bin # ./startFusion.sh
09 Feb 2015 11:13:01:274 [INFO] IBM Tivoli Integration Composer 7.5.3.0 Build 201411111713 logger started. (This should only happen once.)
09 Feb 2015 11:13:01:276 [INFO] Java version: JRE 1.6.0 IBM J9 2.4 Linux amd64-64 jvmxa6460sr10-20111207_96808 (JIT enabled, AOT enabled)
J9VM – 20111207_096808
JIT – r9_20111107_21307ifx1
GC – 20110519_AA
09 Feb 2015 11:13:01:276 [INFO] Java vendor: IBM Corporation
09 Feb 2015 11:13:01:345 [INFO] Mediator created. (This should only happen once.)
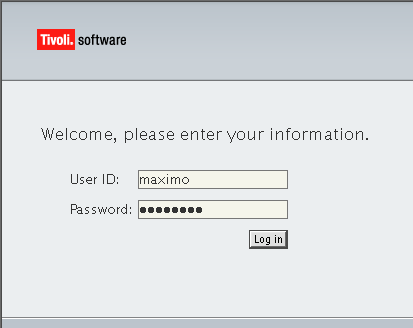
Log in to Integration Composer using your maxdb75 database credentials.
Create data source for TADDM CIType ( Configuration Item )
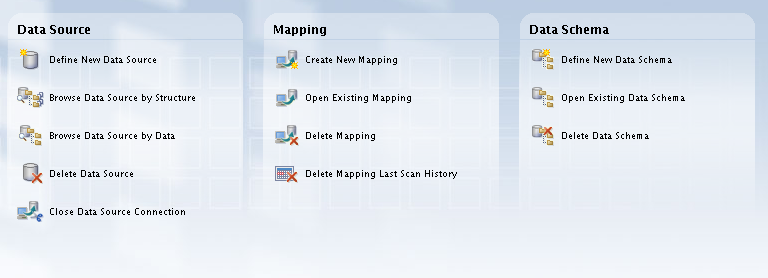
Click Define New Data Source on the Integration Composer Console.
 Select TADDM75CIType from the data schemes, then click Next.
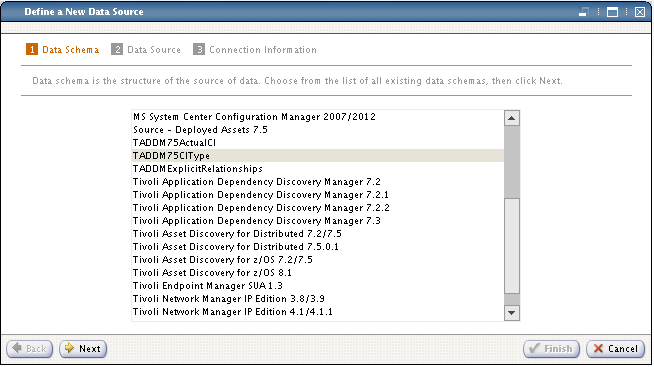 Specify the data source name then click Next.
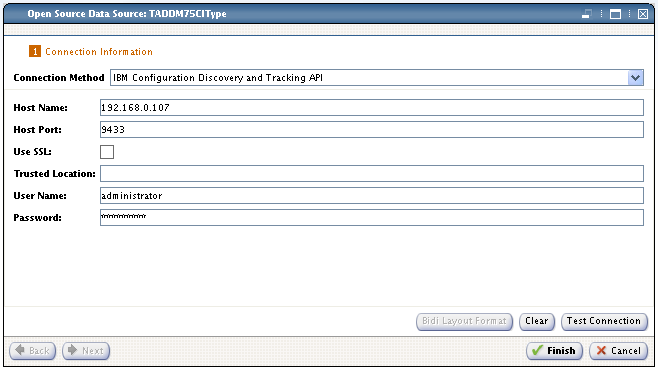
 Define your TADDM server connection details. Specify the hostname or ip address, TADDM port, username and password. Please note that TADDM Version 7.2.1 or earlier uses 9530 for host port. TADDM Version 7.2.2 or later uses 9433 port for host port.
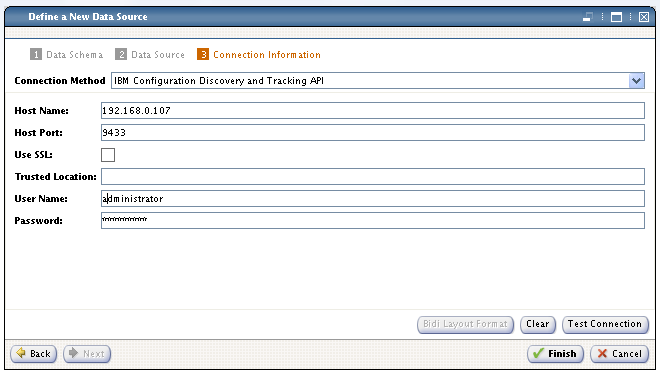 Test the connection then click OK if the connection is successful. Please note that the User Name is case sensitive.
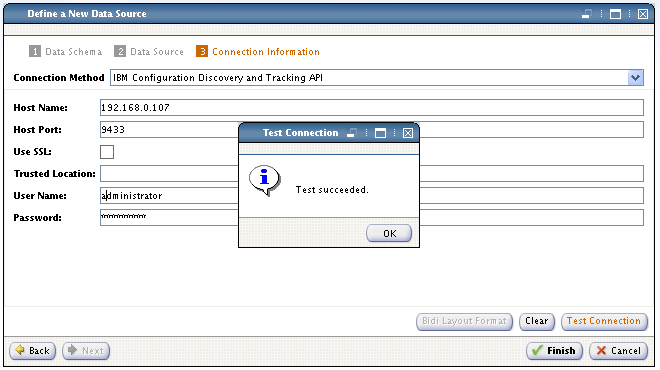 Click Finish to save the Data Source.
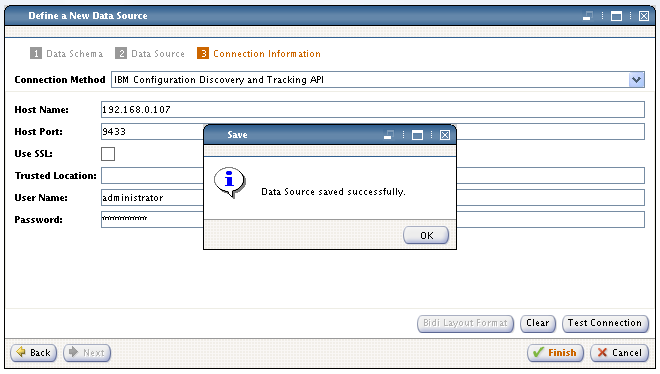
Create data source for TADDM Actual CI ( Configuration Item )
Click Define New Data Source on the Integration Composer Console.
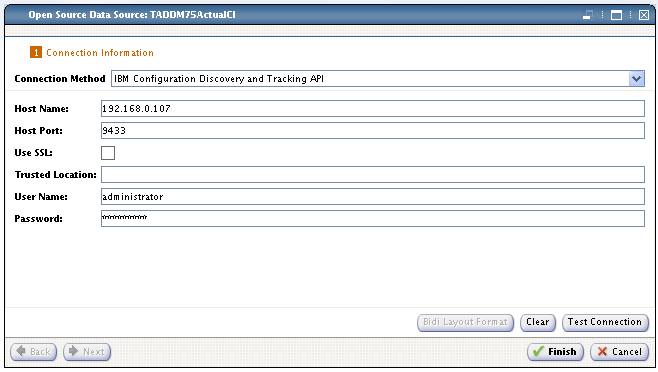
Select TADDM75ActualCI from the data schemes, then click Next.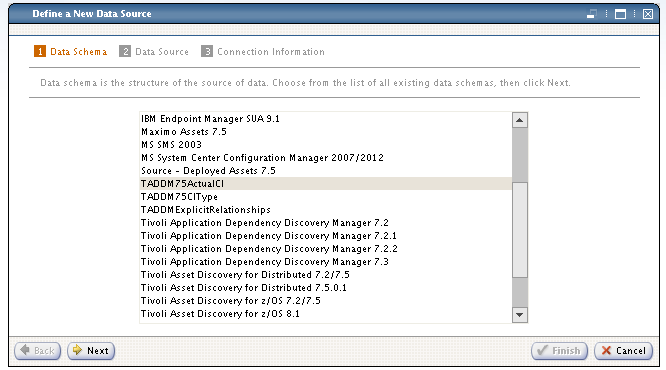 Specify the data source name then click Next.
 Define your TADDM server connection details. Specify the hostname or ip address, TADDM port, username and password. Please note that TADDM Version 7.2.1 or earlier uses 9530 for host port. TADDM Version 7.2.2 or later uses 9433 port for host port.Test the connection then click OK if the connection is successful. Please note that the User Name is case sensitive.Click Finish to save the Data Source.
Create target data source for Control Desk CIType ( Configuration Item )
Click Define New Data Source on the Integration Composer Console.
Select CCMDB75CIType from the data schemes, then click Next.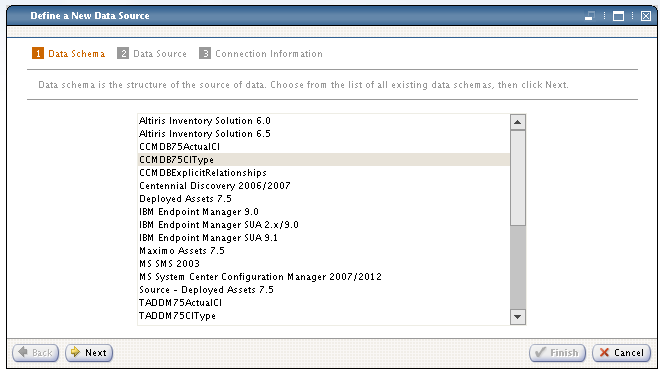 Specify the data source name then click Next.
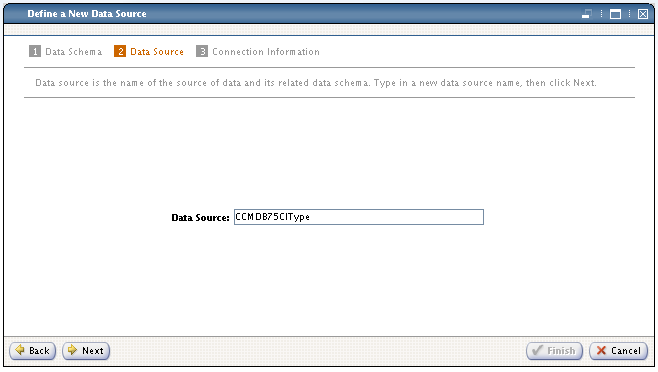 Specify your DB2 server connection details.
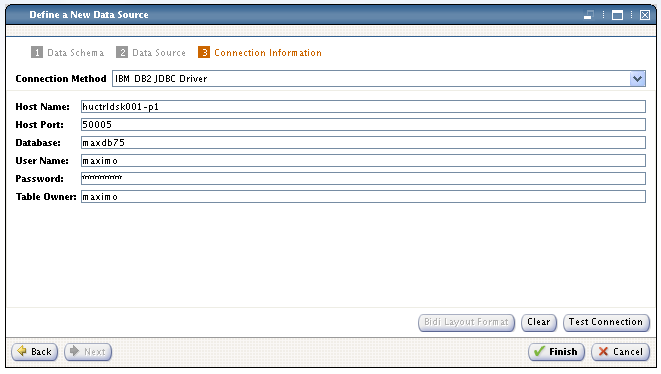 Test the database connection, then click OK once the connection is successful.
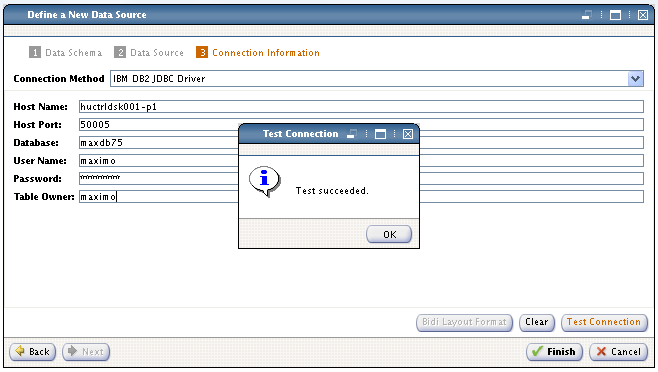 Click Finish to save the data source.
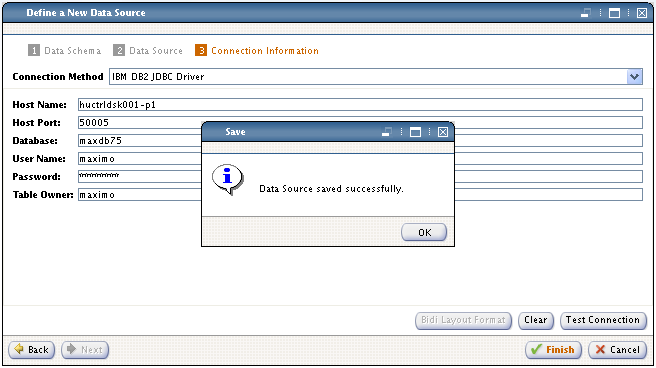
Create target data source for Control Desk Actual CI ( Configuration Item )
Click Define New Data Source on the Integration Composer Console.
Select CCMDB75ActualCI from the data schemes, then click Next.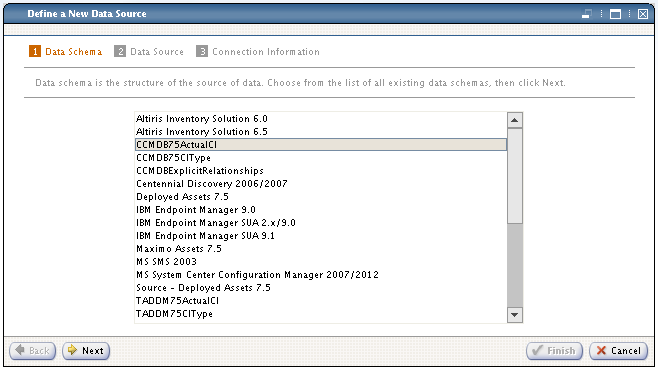 Specify the data source name then click Next.
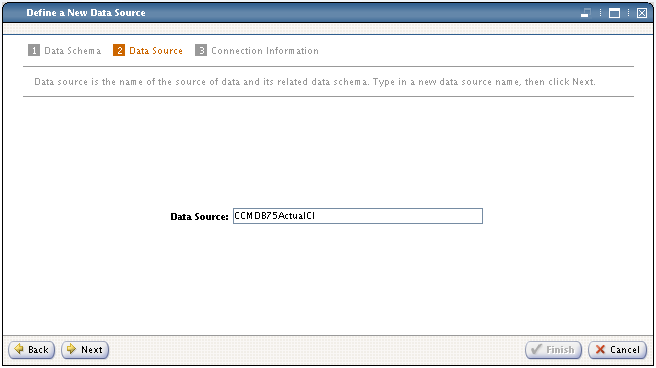 Specify your DB2 server connection details.Test the database connection, then click OK once the connection is successful.Click Finish to save the data source.
Create mappings between TADDM CIType and Control Desk CIType
Click Create New Mapping on the Integration Composer Console.
Select TADDM75CIType as Source then select CCMDB75CIType as Target. Name the mapping to TADDM-2-TUSC-CI-Types then click OK.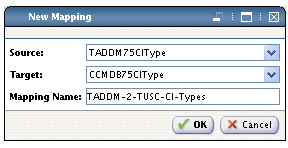
Click specify the Password then click Finish at the TADDM75CIType data source selection.
 Click specify the Password then click Finish at the CCMDB75CIType data source selection.
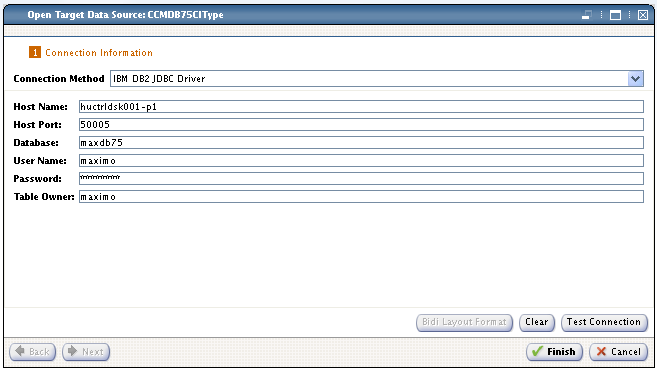 Select Import from the upper Select Action menu.
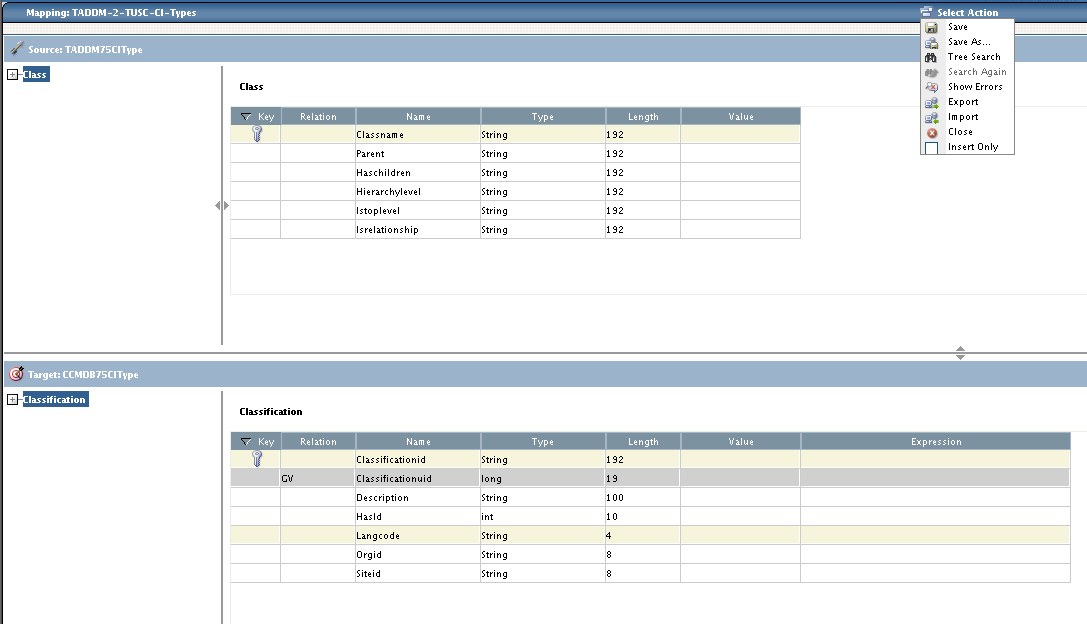 Select TADDMToCIType75.fsn from the list then click Open.
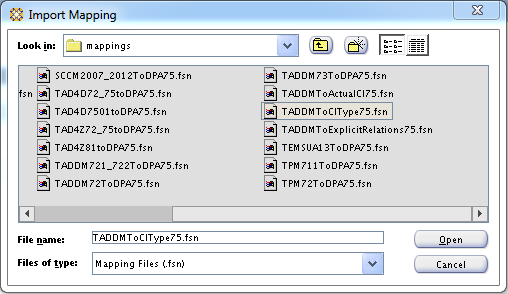
Select Save from the upper Select Action menu.
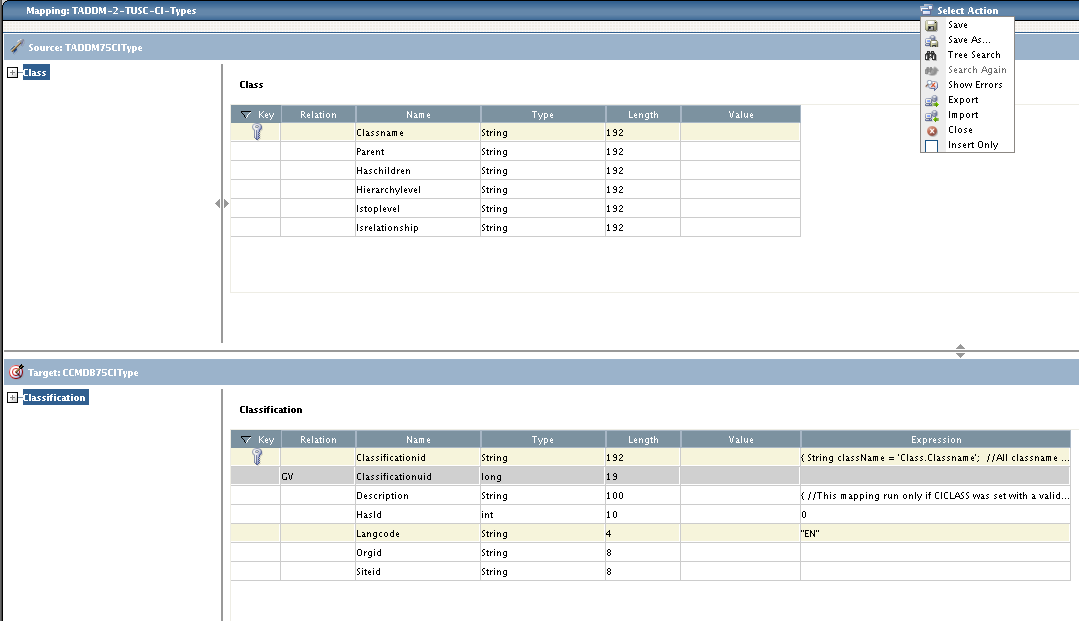 Select Close from the upper Select Action menu then click Yes to close the mapping window.
Create mapping between TADDM Actual CI and TADDM Actual CI
Click Create New Mapping on the Integration Composer Console.
Select TADDM75ActualCI as Source then select CCMDB75ActualCI as Target. Name the mapping to TADDM-2-TUSC-Actual-CIs then click OK.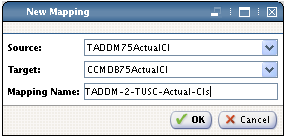
Click specify the Password then click Finish at the TADDM75ActualCI data source selection.
 Click specify the Password then click Finish at the CCMDB75ActualCI data source selection.
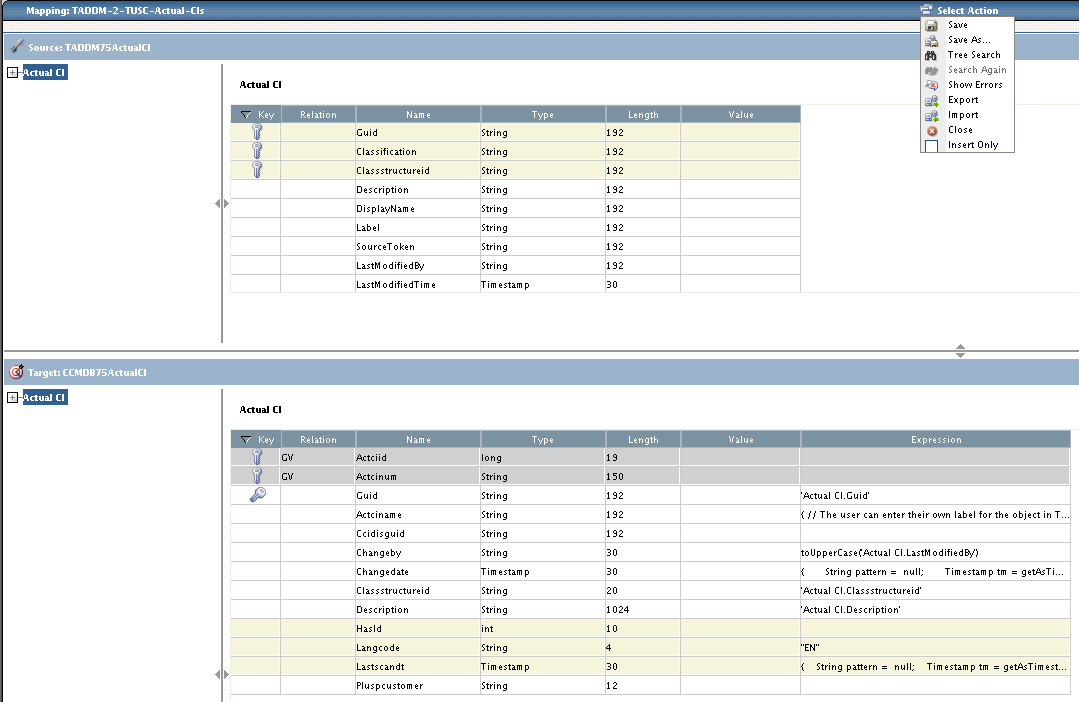
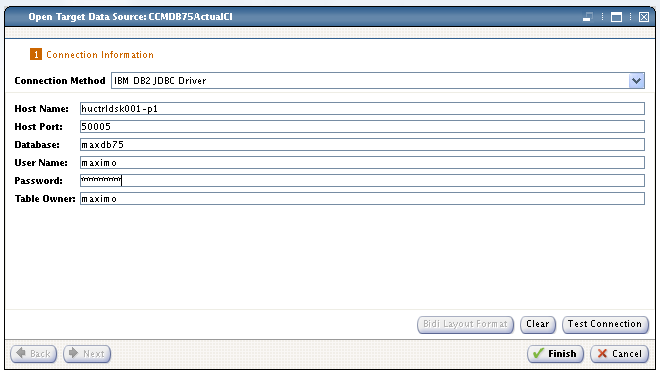 Select Import from the upper Select Action menu.
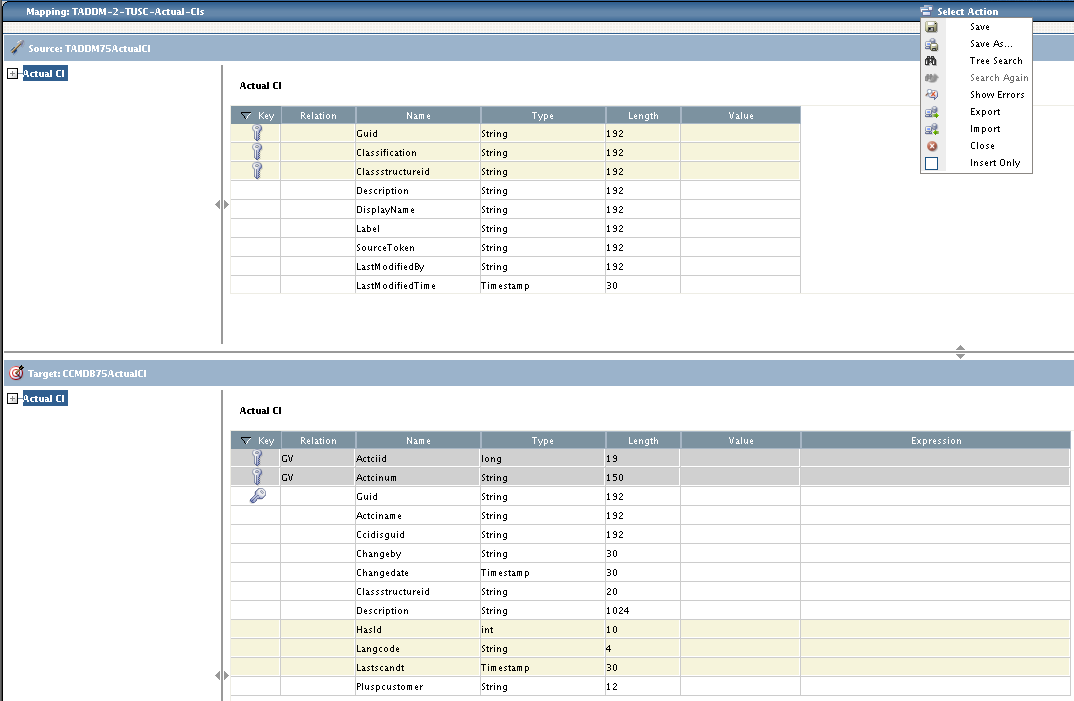 Select TADDMtoActualCI75.fsn then click Open.
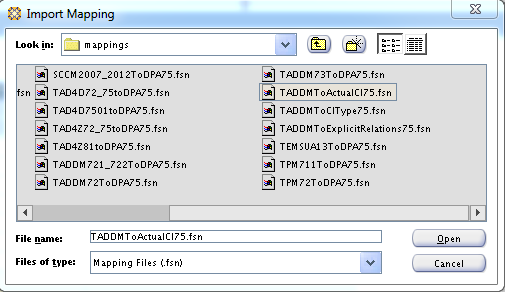
Select Save from the upper Select Action menu.
 Select Close from the upper Select Action menu then click Yes to close the mapping window.
Run executeMapping.sh on the CIType mapping to populate the Control Desk CIType database
executeMapping.sh is located in ./bin directory of your Integration Composer root directory. Run the command with the following syntax:
./executeMapping.sh TADDM-2-TUSC-CI-Types maximo yourpassword administrator yourpassword maximo yourpassword
If the procedure completes successfully you should be seeing this:
09 Feb 2015 13:25:41:640 [INFO]
========================================================
Mapping execution completed
Mapping: TADDM-2-TUSC-CI-Types
Execution time: 00:46:28
Classifications created: 88
Records created: 109947
Records updated: 41808
Records deleted: 1583
Errors: 0
========================================================
Mapping execution completed
Mapping: TADDM-2-TUSC-CI-Types
Execution time: 00:46:28
Classifications created: 88
Records created: 109947
Records updated: 41808
Records deleted: 1583
Errors: 0
NRS GUIDs created: 0
NRS errors: 0
NRS records updated on Alternate Keys: 0
NRS records found as duplicate: 0
NRS records deleted because of duplicate: 0
NRS warnings due to duplicate data: 0
========================================================
NRS errors: 0
NRS records updated on Alternate Keys: 0
NRS records found as duplicate: 0
NRS records deleted because of duplicate: 0
NRS warnings due to duplicate data: 0
========================================================
Done
Mapping completed successfully.
Integration Composer has finished.
Mapping completed successfully.
Integration Composer has finished.
Activate CIs Types on Control Desk
Log in to your Control Desk console and navigate to Administrator->CI Types
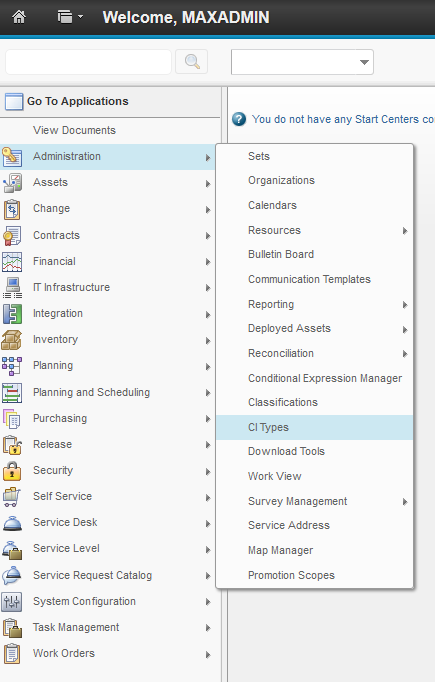
It is important to point out here that you should only activate a very small number of CI Types at first then try to expand the list later on. We only enabled the Linux system specific Configuration Item Types such as:
- SYS.LINUX.LINUXUNITARYCOMPUTERSYSTEM
- SYS.UNITARYCOMPUTERSYSTEM
- SYS.COMPUTERSYSTEM
- SYS.LINUX.LINUX
 You can Activate a CI by selecting it then clicking on the Change Status option in the left menu.
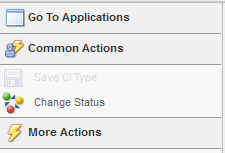
Run executeMapping.sh on the Actual CI mapping to populate the Control Desk Actual CI database
Prior to import the Actual Configuration items su over to ctginst1 and run the following command against your db2 database:
/app/ibm/db2/V9.7/bin/db2jdbcbind -url jdbc:db2://huctrldsk001-p1.ipm.local:50005/maxdb75 -user maximo -password yourpassword -size 15
Binder performing action “add” to “jdbc:db2://huctrldsk001-p1.ipm.local:50005/maxdb75” under collection “NULLID”:
Package “SYSSTAT”: Already exists (No need to bind).
Package “SYSSH100”: Already exists (No need to bind).
Package “SYSSH200”: Already exists (No need to bind).
Package “SYSSH300”: Already exists (No need to bind).
Package “SYSSH400”: Already exists (No need to bind).
Package “SYSSN100”: Already exists (No need to bind).
Package “SYSSN200”: Already exists (No need to bind).
Package “SYSSN300”: Already exists (No need to bind).
Package “SYSSN400”: Already exists (No need to bind).
Package “SYSSH101”: Already exists (No need to bind).
Package “SYSSH201”: Already exists (No need to bind).
Package “SYSSH301”: Already exists (No need to bind).
Package “SYSSH401”: Already exists (No need to bind).
Package “SYSSN101”: Already exists (No need to bind).
Package “SYSSN201”: Already exists (No need to bind).
Package “SYSSN301”: Already exists (No need to bind).
Package “SYSSN401”: Already exists (No need to bind).
Package “SYSSH102”: Already exists (No need to bind).
Package “SYSSH202”: Already exists (No need to bind).
Package “SYSSH302”: Already exists (No need to bind).
Package “SYSSH402”: Already exists (No need to bind).
Package “SYSSN102”: Already exists (No need to bind).
Package “SYSSN202”: Already exists (No need to bind).
Package “SYSSN302”: Already exists (No need to bind).
Package “SYSSN402”: Already exists (No need to bind).
Package “SYSLH100”: Already exists (No need to bind).
Package “SYSLH200”: Already exists (No need to bind).
Package “SYSLH300”: Already exists (No need to bind).
Package “SYSLH400”: Already exists (No need to bind).
Package “SYSLN100”: Already exists (No need to bind).
Package “SYSLN200”: Already exists (No need to bind).
Package “SYSLN300”: Already exists (No need to bind).
Package “SYSLN400”: Already exists (No need to bind).
Package “SYSLH101”: Already exists (No need to bind).
Package “SYSLH201”: Already exists (No need to bind).
Package “SYSLH301”: Already exists (No need to bind).
Package “SYSLH401”: Already exists (No need to bind).
Package “SYSLN101”: Already exists (No need to bind).
Package “SYSLN201”: Already exists (No need to bind).
Package “SYSLN301”: Already exists (No need to bind).
Package “SYSLN401”: Already exists (No need to bind).
Package “SYSLH102”: Already exists (No need to bind).
Package “SYSLH202”: Already exists (No need to bind).
Package “SYSLH302”: Already exists (No need to bind).
Package “SYSLH402”: Already exists (No need to bind).
Package “SYSLN102”: Already exists (No need to bind).
Package “SYSLN202”: Already exists (No need to bind).
Package “SYSLN302”: Already exists (No need to bind).
Package “SYSLN402”: Already exists (No need to bind).
Package “SYSLH103”: Bind succeeded.
Package “SYSLH203”: Bind succeeded.
Package “SYSLH303”: Bind succeeded.
Package “SYSLH403”: Bind succeeded.
Package “SYSLN103”: Bind succeeded.
Package “SYSLN203”: Bind succeeded.
Package “SYSLN303”: Bind succeeded.
Package “SYSLN403”: Bind succeeded.
Package “SYSLH104”: Bind succeeded.
Package “SYSLH204”: Bind succeeded.
Package “SYSLH304”: Bind succeeded.
Package “SYSLH404”: Bind succeeded.
Package “SYSLN104”: Bind succeeded.
Package “SYSLN204”: Bind succeeded.
Package “SYSLN304”: Bind succeeded.
Package “SYSLN404”: Bind succeeded.
Package “SYSLH105”: Bind succeeded.
Package “SYSLH205”: Bind succeeded.
Package “SYSLH305”: Bind succeeded.
Package “SYSLH405”: Bind succeeded.
Package “SYSLN105”: Bind succeeded.
Package “SYSLN205”: Bind succeeded.
Package “SYSLN305”: Bind succeeded.
Package “SYSLN405”: Bind succeeded.
Package “SYSLH106”: Bind succeeded.
Package “SYSLH206”: Bind succeeded.
Package “SYSLH306”: Bind succeeded.
Package “SYSLH406”: Bind succeeded.
Package “SYSLN106”: Bind succeeded.
Package “SYSLN206”: Bind succeeded.
Package “SYSLN306”: Bind succeeded.
Package “SYSLN406”: Bind succeeded.
Package “SYSLH107”: Bind succeeded.
Package “SYSLH207”: Bind succeeded.
Package “SYSLH307”: Bind succeeded.
Package “SYSLH407”: Bind succeeded.
Package “SYSLN107”: Bind succeeded.
Package “SYSLN207”: Bind succeeded.
Package “SYSLN307”: Bind succeeded.
Package “SYSLN407”: Bind succeeded.
Package “SYSLH108”: Bind succeeded.
Package “SYSLH208”: Bind succeeded.
Package “SYSLH308”: Bind succeeded.
Package “SYSLH408”: Bind succeeded.
Package “SYSLN108”: Bind succeeded.
Package “SYSLN208”: Bind succeeded.
Package “SYSLN308”: Bind succeeded.
Package “SYSLN408”: Bind succeeded.
Package “SYSLH109”: Bind succeeded.
Package “SYSLH209”: Bind succeeded.
Package “SYSLH309”: Bind succeeded.
Package “SYSLH409”: Bind succeeded.
Package “SYSLN109”: Bind succeeded.
Package “SYSLN209”: Bind succeeded.
Package “SYSLN309”: Bind succeeded.
Package “SYSLN409”: Bind succeeded.
Package “SYSLH10A”: Bind succeeded.
Package “SYSLH20A”: Bind succeeded.
Package “SYSLH30A”: Bind succeeded.
Package “SYSLH40A”: Bind succeeded.
Package “SYSLN10A”: Bind succeeded.
Package “SYSLN20A”: Bind succeeded.
Package “SYSLN30A”: Bind succeeded.
Package “SYSLN40A”: Bind succeeded.
Package “SYSLH10B”: Bind succeeded.
Package “SYSLH20B”: Bind succeeded.
Package “SYSLH30B”: Bind succeeded.
Package “SYSLH40B”: Bind succeeded.
Package “SYSLN10B”: Bind succeeded.
Package “SYSLN20B”: Bind succeeded.
Package “SYSLN30B”: Bind succeeded.
Package “SYSLN40B”: Bind succeeded.
Package “SYSLH10C”: Bind succeeded.
Package “SYSLH20C”: Bind succeeded.
Package “SYSLH30C”: Bind succeeded.
Package “SYSLH40C”: Bind succeeded.
Package “SYSLN10C”: Bind succeeded.
Package “SYSLN20C”: Bind succeeded.
Package “SYSLN30C”: Bind succeeded.
Package “SYSLN40C”: Bind succeeded.
Package “SYSLH10D”: Bind succeeded.
Package “SYSLH20D”: Bind succeeded.
Package “SYSLH30D”: Bind succeeded.
Package “SYSLH40D”: Bind succeeded.
Package “SYSLN10D”: Bind succeeded.
Package “SYSLN20D”: Bind succeeded.
Package “SYSLN30D”: Bind succeeded.
Package “SYSLN40D”: Bind succeeded.
Package “SYSLH10E”: Bind succeeded.
Package “SYSLH20E”: Bind succeeded.
Package “SYSLH30E”: Bind succeeded.
Package “SYSLH40E”: Bind succeeded.
Package “SYSLN10E”: Bind succeeded.
Package “SYSLN20E”: Bind succeeded.
Package “SYSLN30E”: Bind succeeded.
Package “SYSLN40E”: Bind succeeded.
DB2Binder finished.
Once that is done run the executeMapping.sh against the Actual CI mapping like this:
HUCTRLDSK001-P1:/app/IBM/Integration_Composer/bin # ./executeMapping.sh TADDM-2-TUSC-Actual-CIs maximo yourpassword administrator yourpassword maximo yourpassword
Integration Composer will now start.
IBM Tivoli Integration Composer 7.5.3.0 Build 201411111713
09 Feb 2015 13:35:55:371 [INFO] IBM Tivoli Integration Composer 7.5.3.0 Build 201411111713
Mapping: TADDM-2-TUSC-Actual-CIs
Creating data source Fusion… done
IBM Tivoli Integration Composer database version: V7507-40
Retrieving mapping definition TADDM-2-TUSC-Actual-CIs… done
Creating source data source TADDM75ActualCI… done
Connecting to source data source TADDM75ActualCI…
09 Feb 2015 13:35:56:371 [INFO] ResourceManager : Loading resource file /app/IBM/Integration_Composer/data/properties/jdbcinfo.properties : 39 resource(s) loaded.
09 Feb 2015 13:35:56:992 [INFO] Collation version: 2.2, build: null, home: /app/IBM/Integration_Composer
09 Feb 2015 13:35:57:001 [INFO] TADDMActualCI._loadResources: TADDM global depth value set at 3
09 Feb 2015 13:35:57:001 [INFO] TADDMActualCI._loadResources: TADDM deleted GUIDs will not be logged; Actual CI deletion is disabled.
09 Feb 2015 13:35:57:002 [INFO] TADDMActualCI._loadResources: Authorized space filtering enabled.
09 Feb 2015 13:35:57:125 [INFO] AppServer Exclusions Filtering will be turned off. TADDM version is 7.3 or greater.
09 Feb 2015 13:35:57:125 [INFO] TADDMActualCI._loadResources: Relationships marked for deletion will only be deleted if ITIC processed both the target and source during this run.
09 Feb 2015 13:35:57:126 [INFO] …TADDMActualCI._loadResources: 10 threads will be used to gather TADDM data.
… … A maximum of 50 objects will be queued at one time.
Connecting to source data source TADDM75ActualCI… done
Creating target data source CCMDB75ActualCI… done
Connecting to target data source CCMDB75ActualCI…
Connecting to target data source CCMDB75ActualCI… done
Retrieving mapping expressions… done
Retrieving mapping deciding classes… done
retrieving mapping expressions 44
finished mapping expressions 1
finished mapping expressions 2
finished mapping expressions 3
finished mapping expressions 4
finished mapping expressions 5
finished mapping expressions 6
finished mapping expressions 7
finished mapping expressions 8
finished mapping expressions 9
finished mapping expressions 10
finished mapping expressions 11
finished mapping expressions 12
finished mapping expressions 13
finished mapping expressions 14
finished mapping expressions 15
finished mapping expressions 16
finished mapping expressions 17
finished mapping expressions 18
finished mapping expressions 19
finished mapping expressions 20
finished mapping expressions 21
finished mapping expressions 22
finished mapping expressions 23
finished mapping expressions 24
finished mapping expressions 25
finished mapping expressions 26
finished mapping expressions 27
finished mapping expressions 28
finished mapping expressions 29
finished mapping expressions 30
finished mapping expressions 31
finished mapping expressions 32
finished mapping expressions 33
finished mapping expressions 34
finished mapping expressions 35
finished mapping expressions 36
finished mapping expressions 37
finished mapping expressions 38
finished mapping expressions 39
finished mapping expressions 40
finished mapping expressions 41
finished mapping expressions 42
finished mapping expressions 43
finished mapping expressions 44
done mapping expressions
translating mappings 6
finished mappings 1
finished mappings 2
finished mappings 3
finished mappings 4
finished mappings 5
finished mappings 6
done mappings
retrieving deciding classes 6
finished deciding classes 1
finished deciding classes 2
finished deciding classes 3
finished deciding classes 4
finished deciding classes 5
finished deciding classes 6
done deciding classes
generating source code 1
finished source code 1
done source code
generating target code 6
finished target code 1
finished target code 2
finished target code 3
finished target code 4
finished target code 5
finished target code 6
done target code
retrieving file names to compile 6
finished file name 1
finished file name 2
finished file name 3
finished file name 4
finished file name 5
finished file name 6
done file names
Compiling 11 files 11
finished compiling 1
finished compiling 2
finished compiling 3
finished compiling 4
finished compiling 5
finished compiling 6
finished compiling 7
finished compiling 8
finished compiling 9
finished compiling 10
finished compiling 11
done
REMOVELISTENER
09 Feb 2015 13:35:57:806 [INFO]
========================================================
Start mapping execution
Mapping: TADDM-2-TUSC-Actual-CIs
========================================================
09 Feb 2015 13:36:06:589 [INFO] TADDMActualCI.getClassificationDepthSetting():Classification SYS.LINUX.LINUX will be processed at depth level 1 because it is an active non-top-level classification
09 Feb 2015 13:36:07:059 [WARN]
09 Feb 2015 13:36:07:060 [WARN] The following top level classifications are in a promotion scope, but not activated. CIs with these classifications will only be imported from TADDM if they are related to other active, top-level CIs.
09 Feb 2015 13:36:07:060 [WARN] SYS.BUSINESSSYSTEM
09 Feb 2015 13:36:07:060 [WARN] APP.APPLICATION
09 Feb 2015 13:36:07:060 [WARN] APP.SOFTWAREIMAGE
09 Feb 2015 13:36:07:060 [INFO]
09 Feb 2015 13:36:07:061 [INFO] Querying TADDM for CIs of the classifications that are active…
09 Feb 2015 13:36:07:061 [INFO]
09 Feb 2015 13:36:07:061 [INFO] All TADDM Guids for the active Classifications will be imported.
09 Feb 2015 13:36:07:140 [INFO] Retrieved 0 Authorized CIs for filtering.
09 Feb 2015 13:36:07:187 [INFO] TADDM contains 4 guids for the SYS.LINUX.LINUX classification.
09 Feb 2015 13:36:07:188 [INFO] The number of new and updated SYS.LINUX.LINUX GUIDs to process is 4. These will be processed at depth level 1.
09 Feb 2015 13:36:07:234 [INFO] TADDM contains 4 guids for the SYS.COMPUTERSYSTEM classification.
09 Feb 2015 13:36:07:234 [INFO] The number of new and updated SYS.COMPUTERSYSTEM GUIDs to process is 4. These will be processed at depth level 3.
09 Feb 2015 13:36:07:234 [INFO] The following classifications will be processed as subclasses of SYS.COMPUTERSYSTEM at depth level 3.
09 Feb 2015 13:36:07:235 [INFO] SYS.LINUX.LINUXUNITARYCOMPUTERSYSTEM
09 Feb 2015 13:36:07:235 [INFO] SYS.UNITARYCOMPUTERSYSTEM
09 Feb 2015 13:36:07:235 [INFO]
09 Feb 2015 13:36:07:236 [INFO] The total number of active Guids to process is: 8
Actual CI: 3EA8E707D644308A8A3CFB967DB7F726
09 Feb 2015 13:36:11:389 [INFO] NRS initialized.
09 Feb 2015 13:36:11:409 [INFO] MaxSequenceProvider created. (This should only happen once.)
Actual CI: 021E523A62B73A9E9A9017CFCE0DECEA
Actual CI: 9EBC5B2280883ECFA71F03DDB8CA4366
Actual CI: 151EAA4AD64A3E73938800BE3164BEE6
Actual CI: 5867ECDB40603FEDA8ADFAAA9C257300
Actual CI: 021E523A62B73A9E9A9017CFCE0DECEA
Actual CI: E92F23A3DD3836E59EDEFC5438B76168
Actual CI: FBFD45DA10C93EDB8D74D00551F511C1
Actual CI: F437063E046032F59F60A050018F01EC
Actual CI: C084A1E967653AF4940E2A7152C02149
Actual CI: 550246C3B0F83308960EF8330500B680
Actual CI: 28E856A815043FA6887ABB2C5A0E73B7
Actual CI: 803AB968A0783313AC883835A0EDDDA2
Actual CI: 4CA413D13A5E3383A3724EA072F803D8
Actual CI: E4B9E460B82E3DACB7D2912F6A9CCE87
Actual CI: 0B2FBE6FCA4B35B8B93BC244883BEDC4
Actual CI: C824EFE2CA163D5EA95EF79BAB769732
Actual CI: 3EA8E707D644308A8A3CFB967DB7F726
Actual CI: 26BBEF79820B300D9366E5FA7B95D807
Actual CI: 530DB97F996832C291088B4A66055CBB
Actual CI: 72D9B0CD2E733F63A4C75C76104251EF
Actual CI: DEDE63ECA1AE37A1A1A5AE1E28E63857
Actual CI: 56BADF3D751D302694E18DD6AF7990F9
Actual CI: E8BE04B2F9953B798B935F64672BDAB9
Actual CI: 1838453074AA304B8C9EB270B3209CDB
Actual CI: EDA8200495A731AFB48A55228ED51570
Actual CI: 29432FD455E03F43920AED7D29798258
Actual CI: 055E03B89E34320882ABD781A69F9809
Actual CI: 5D9F1A0574333C6EBE33DECA4E09BEC3
Actual CI: 151EAA4AD64A3E73938800BE3164BEE6
Actual CI: 9BEF9EC3D9C3333AB8E3D2BE42433035
Actual CI: DD025C72A0B5391BBC14E0F5458D5093
Actual CI: 78AD41482B143ABA8D6397BC899D1ECD
Actual CI: 28DD04BB28D73BDD8013954A03C1D4F3
Actual CI: 933D9FC7AD373FEFA2A2609AFD2E033C
Actual CI: B310D4FB341B3ECB8B8E3DE61B9769BB
Actual CI: 892B43543AB635249544B74FB2D50238
Actual CI: 9F6B77BB3AF132729EBDB479E926B2A0
Actual CI: BFCE3FB197A435E9B9C39320A6BCB734
Actual CI: 6D738D4A858E3F739EE5019BF6DAE542
09 Feb 2015 13:36:13:913 [INFO] Processed Status — TopLevel CIs: 8/8 All CIs this Interval: 52 Total CIs: 52
Actual CI: 3605D85E1356342789A8C75555D1753C
Actual CI: 9EBC5B2280883ECFA71F03DDB8CA4366
Actual CI: E89365947C4A3B028E09856A0ECBD001
Actual CI: 29811E1696A23E6DBEFFCACCD48F9CFF
Actual CI: 8332EE5EB64031688E2A8FF94CF8F8FD
Actual CI: 550F4F2A50F6386D9F5C62D8D8078F8B
Actual CI: 992CB812486E3F6994890C610520DB2A
Actual CI: CDC438AE661B3E558BF1C9E3F674D7D5
Actual CI: 7CB0F3129F7538888C6112812FC63919
Actual CI: DF646C6330F4326AA08E66F311BD8748
Actual CI: 97658F61EAB23405BAA76164A00C7342
Actual CI: 352BBACA06E63002AA30DC0D24F106E2
09 Feb 2015 13:36:14:113 [INFO]
========================================================
Mapping execution completed
Mapping: TADDM-2-TUSC-Actual-CIs
Execution time: 00:00:16
Actual CIs created: 8
Records created: 404
Records updated: 0
Records deleted: 0
Errors: 0
NRS GUIDs created: 12
NRS errors: 0
NRS records updated on Alternate Keys: 0
NRS records found as duplicate: 0
NRS records deleted because of duplicate: 0
NRS warnings due to duplicate data: 0
========================================================
NRS errors: 0
NRS records updated on Alternate Keys: 0
NRS records found as duplicate: 0
NRS records deleted because of duplicate: 0
NRS warnings due to duplicate data: 0
========================================================
Done
Mapping completed successfully.
Integration Composer has finished.
Mapping completed successfully.
Integration Composer has finished.
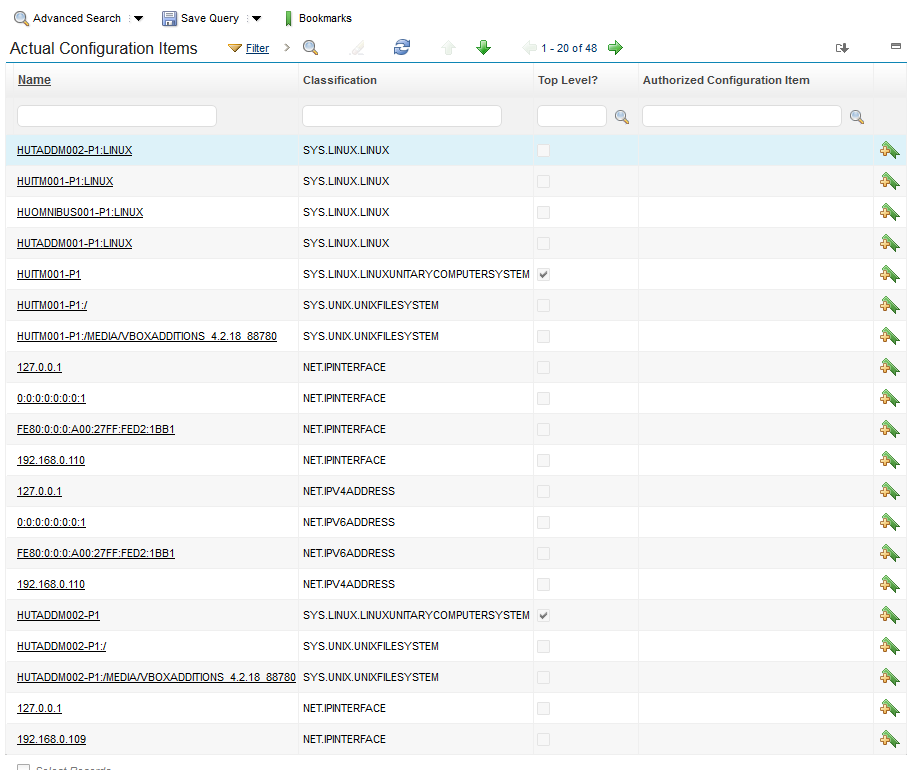
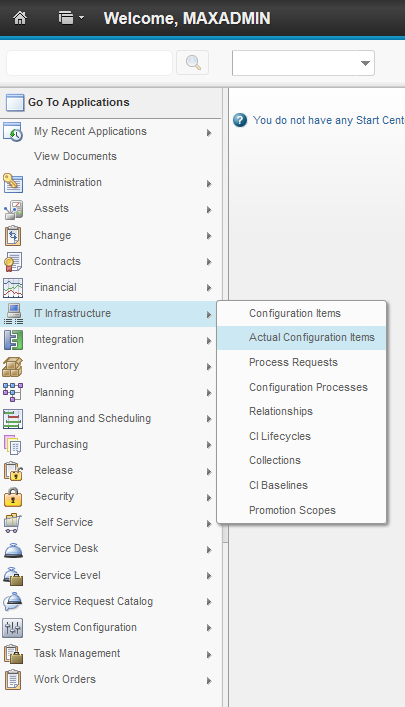
As you can see 8 Actual Configuration items were created using data coming from TADDM. Log in to your Control Desk Console and navigate to: IT Infrastructure -> Actual Configuration Items
The Actual Configuration items window now loads, however it is empty. Click on the blue double arrow icon on the top of the screen to reload data from the database.
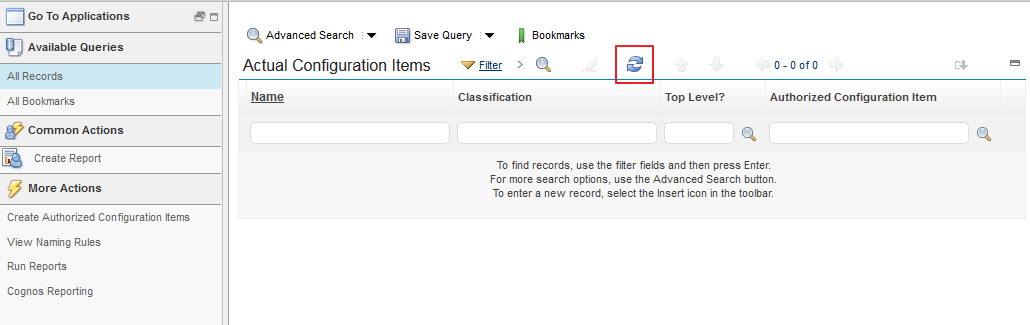 If everything went fine you should be seeing TADDM records showing up here.