Friday 14 October 2022

IBM Maximo Asset Management Fix Pack 7.6.1.3


Abstract

On 30 August 2022, IBM released IBM® Maximo® Asset Management Fix Pack 7.6.1.3.

Download Description

This product update includes fixes and enhancements for Maximo Asset Management 7.6.1. This document provides information for you to use to upgrade Maximo to the latest version. This Fix Pack (internal version number 7.6.1.3) is exclusively for Maximo Asset Management 7.6.1 and cannot be applied to any other Maximo product version.
Products

IBM Maximo for Asset Configuration Manager 7.6.7.3
IBM Maximo for Aviation 7.6.8.2
IBM Maximo for Service Providers 7.6.3.4
IBM Maximo Calibration 7.6.1
IBM Maximo for Life Sciences 7.6.1
IBM Maximo for Utilities 7.6.1
IBM Maximo Spatial Asset Management 7.6.1.1 - released 23 September 2022
IBM Maximo Linear Asset Manager 7.6.1.1
IBM Maximo Asset Management Scheduler 7.6.8.2 (update included in Fixpack 7.6.1.3)
IBM Maximo Health, Safety, and Environment Manager 7.6.2
IBM Maximo for Oil & Gas 7.6.2
IBM Maximo for Nuclear Power 7.6.2
IBM Maximo for Transportation 7.6.2.6
IBM Maximo for Civil Infrastructure 7.6.3.3 - released 23 September 2022
IBM Maximo Anywhere 7.6.4
IBM Maximo Asset Health Insights 7.6.1.1
IBM Maximo Enterprise Adapter for Oracle 7.6.1
IBM Maximo Enterprise Adapter for SAP 7.6.1

Considerations

Do not apply the 7.6.1.3 Fix Pack if a 7.6.1.2 Limited Availability (LA) fix created after 26 May 2022 or 7.6.1.2 interim fix (IFix) 021 or later is installed, as the fixes might not be included. If you installed any LA fixes or IFix 021 or later after this date, do not apply the 7.6.1.3 Fix Pack until the first 7.6.1.3 interim fix is released. Then, apply both the 7.6.1.3 Fix Pack and the 7.6.1.3 interim fix.
To receive notifications of updates and fixes for Maximo Asset Management, go to Maximo Asset Management Support and click My Notifications to stay informed of critical IBM software support updates.

Prerequisites

If you use any of these solutions, ensure your environment meets minimum prerequisites before applying 7.6.1.3 Fix Pack to it. After you install Fix Pack 7.6.1.3 and before running Database update from the Configuration Program, update Industry Solutions and Add-Ons listed under Products to the supported version.

Download Package

Tuesday 5 July 2022

Adding an additional language to Maximo 7.6

 There are two methods to add an additional language: via the new GUI option and then via the non-GUI method


Option #1:

Additional languages can be enabled via the Maximo 7.6 Installer.

Steps for Windows environment:
From Start > All Programs > Tivoli's process automation suite > Configuration Program

Click "Configure a New Deployment".


Click the Finish button.

Select "Additional Languages" from the left pane.

Select additional languages and go through the instructions in the wizard.


Option #2:

Manual installation steps:

1. There are archived files that come with the Maximo installation which contain all the necessary XML Localization Interchange File Format (XLIFF) files to deploy for adding different languages to Maximo. Each language has a two-character representation that allows the archive folders to be identified by language.
For example, Simplified Chinese is identified by "zh".

  • Download the Maximo 7.6 installation files. Navigate to the \\Install\TPAEInstallerRepository\files folder.
  • Open the xliffs_7.60.20141126-0950.zipp with winzip or 7zip.
  • Look for the MaximoLangPkgXliff_Zh_CN.zip file.
  • The XLIFF files from the MaximoLangPkgXliff_Zh_CN.zip file need to be extracted to the \\ibm\smp\maximo\tools\maximo\zh\xliff folder (where Maximo is installed).


Below is a screenshot before extracting the content of the MaximoLangPkgXliff_Zh_CN.zip file to the \\ibm\smp\maximo\tools\maximo\zh\xliff folder:


Below is a screen shot after the content from MaximoLangPkgXliff_Zh_CN.zip has been extracted to the \\ibm\smp\maximo\tools\maximo\zh\xliff folder:


2. Use the Translation Data toolkit (TD toolkit) to add a second language to the database. The base language remains the same, and the other language is added as a second language.
  • Stop the Maximo application server from the Websphere console
  • Open a command prompt on the application server
  • Navigate to the \\ibm\smp\maximo\tools\maximo directory
  • Run the command: TDToolkit -addlangZH


  • When the task completes, restart the application server.
  • Go to the Maximo login page. A second language can now be selected from the "Select Language" drop-down selection.


The login user will be presented with a Chinese Start Center after logging in to Maximo.


Sunday 10 April 2022

Default the line item's receipt required field to "YES"


When adding a line item with line type SERVICE to a PO, the line item's receipt required field defaults to "NO". Can we make this field default to YES for every line item?

Answer

If you don't change it manually to "YES", then you can create and approve an invoice for the
line item without ever having received it. Having to set the
field manually every time you order a service makes it prone to error.

To have it default to YES use the following steps:

Goto Administration / Organizations and pull up the organization you wish this to apply to. Then use the Select Action dropdown to select Purchasing Options / PO Options. In here you will see an option called "Allow Receipts against Services by Default" - please check this option
and save your changes. Then logout and back in and the default will be set to YES.

Receipt Required Check-box Automatically Checked After Approved Purchase Order is Received


Question

Why is the Receipt Required check-box automatically checked after you receive an approved purchase order.  The receipt required check-box is not checked on initial purchase order creation.


Cause

When you create a purchase order with a service line item attached, you need to ensure that the receipt required check-box is not marked for the line item.  When the purchase order is approved and received in the Receiving application, the receipt required check-box is automatically populated.


Answer

The purchase order line types of Service or Standard Service are not automatically set to require a receipt.  Invoicing in this way allows the vendor to not receive it first.  When an invoice is completed for the service, the receipt is completed for the invoice lines and can be verified in the purchase order view related records option.
If you receive the purchase order and all lines associated to it before invoicing the line type of Service or Standard Service, the required receipt check-box is updated for the service.  This function is by design.

2way / 3 way / 4 way matching in Maximo

 I have come across queries related to invoice matching in many occasions. What type of matching does Maximo support? Is it a three way matching or four way matching? For some of us who are not familiar with accounting, these questions lead you to a black hole.


The three way match refers to a procedure followed to avoid paying incorrect and fraudulent invoices and is used when processing an invoice received from a vendor or supplier. An invoice that is received from a supplier will be approved and paid by an organization if the purchase order and receiving report prepared by the organization are in compliance. That is in the world of maximo, we need to concentrate on the Invoice(s), Purchase Order(s) and Receipt(s) for a three way match. And the match refers to comparison of quatities, unit prices, total cost, etc. presented in the invoice record with the information on the PO and PO Line Items in the Purchase Orders application and the quantities that are actually received in the Receiving application against each PO line item. So the comparison points are:

  1. Quantity billed Vs. quantity ordered
  2. Invoice cost Vs. PO cost
  3. Quantity billed Vs. quantity received

After the invoice has been validated by this three way match, it can be paid by taking into consideration tolerances if any. 

The four way matching refers to a process when an invoice is matched with the corresponding purchase order for quantity and amount, receiving and, inspection details. In Maximo Purchase Orders application, we can create a purchase order for a material and mark both the checkboxes Inspection Required?  and Receipt Requied? against it. 

Alternatively, in the Item Master application, you can keep the checkbox Inspect on Receipt? checked for an item. When you select that item for a line in the PO, the Inspection Required? checkbox is marked automatically for this PO Line item.

So when you go to the Receiving application to generate receipt of the material and select the ordered item(s), you can check that material with transaction type RECEIPT is in status WINSP (Waiting for inspection). 
Now you need to change the inspection status where you are presented to enter accepted and rejected quantity. 
After changing the inspection status, you can check one more row for the material with transaction type TRANSFER and status COMP. You can also see that the material has now come from the holding location to the storeroom location of the site.

In this case, we see a four way matching as invoices are matched with purchase order, receiving information and inspection information. The comparison points in this type of matching are:

  1. Quantity billed Vs. quantity ordered
  2. Invoice cost Vs. PO cost
  3. Quantity billed Vs. qunatity received
  4. Quantity billed Vs. quantity accepted
Now there is another question, if I create a puchase order with a line item for which the checkbox for Receipt Requied? is not checked. In that case maximo allows a two-way matching as invoices are matched with the purchase order only. The comparison points in this type of matching are:

  1. Quantity billed Vs. quantity ordered
  2. Invoce cost Vs. PO cost. 

So to answer the query about procurement and invoicing in Maximo, it supports two-way, three-way and four-way matching for invoices.

Sunday 20 February 2022

Maximo Manage UI Differences for the Maximo 7.6.x User

Maximo Manage UI Differences for the Maximo 7.6.x User


As Maximo 7.6.x moves into the ‘Manage’ application within the Maximo Application Suite, the Maximo User Interface has changed to As Maximo 7.6.x moves into the ‘Manage’ application within the Maximo Application Suite, the Maximo User Interface has changed to be more in line with the rest of the applications in the Suite. Many thanks to the IBM Team saddled with the responsibility of aligning the Maximo user interface to the rest of the Application Suite (Monitor, Health, etc.).

Even though the ‘skin’ which represents the look and feel of the application throughout has changed, basic functionality remains mostly the same in Manage. The largest exception would be around creating users which needs to be done at Maximo Application Suite (in Suite Administration) level before they can be in Manage, and then the security groups / rights are assigned in Manage, like they are now.

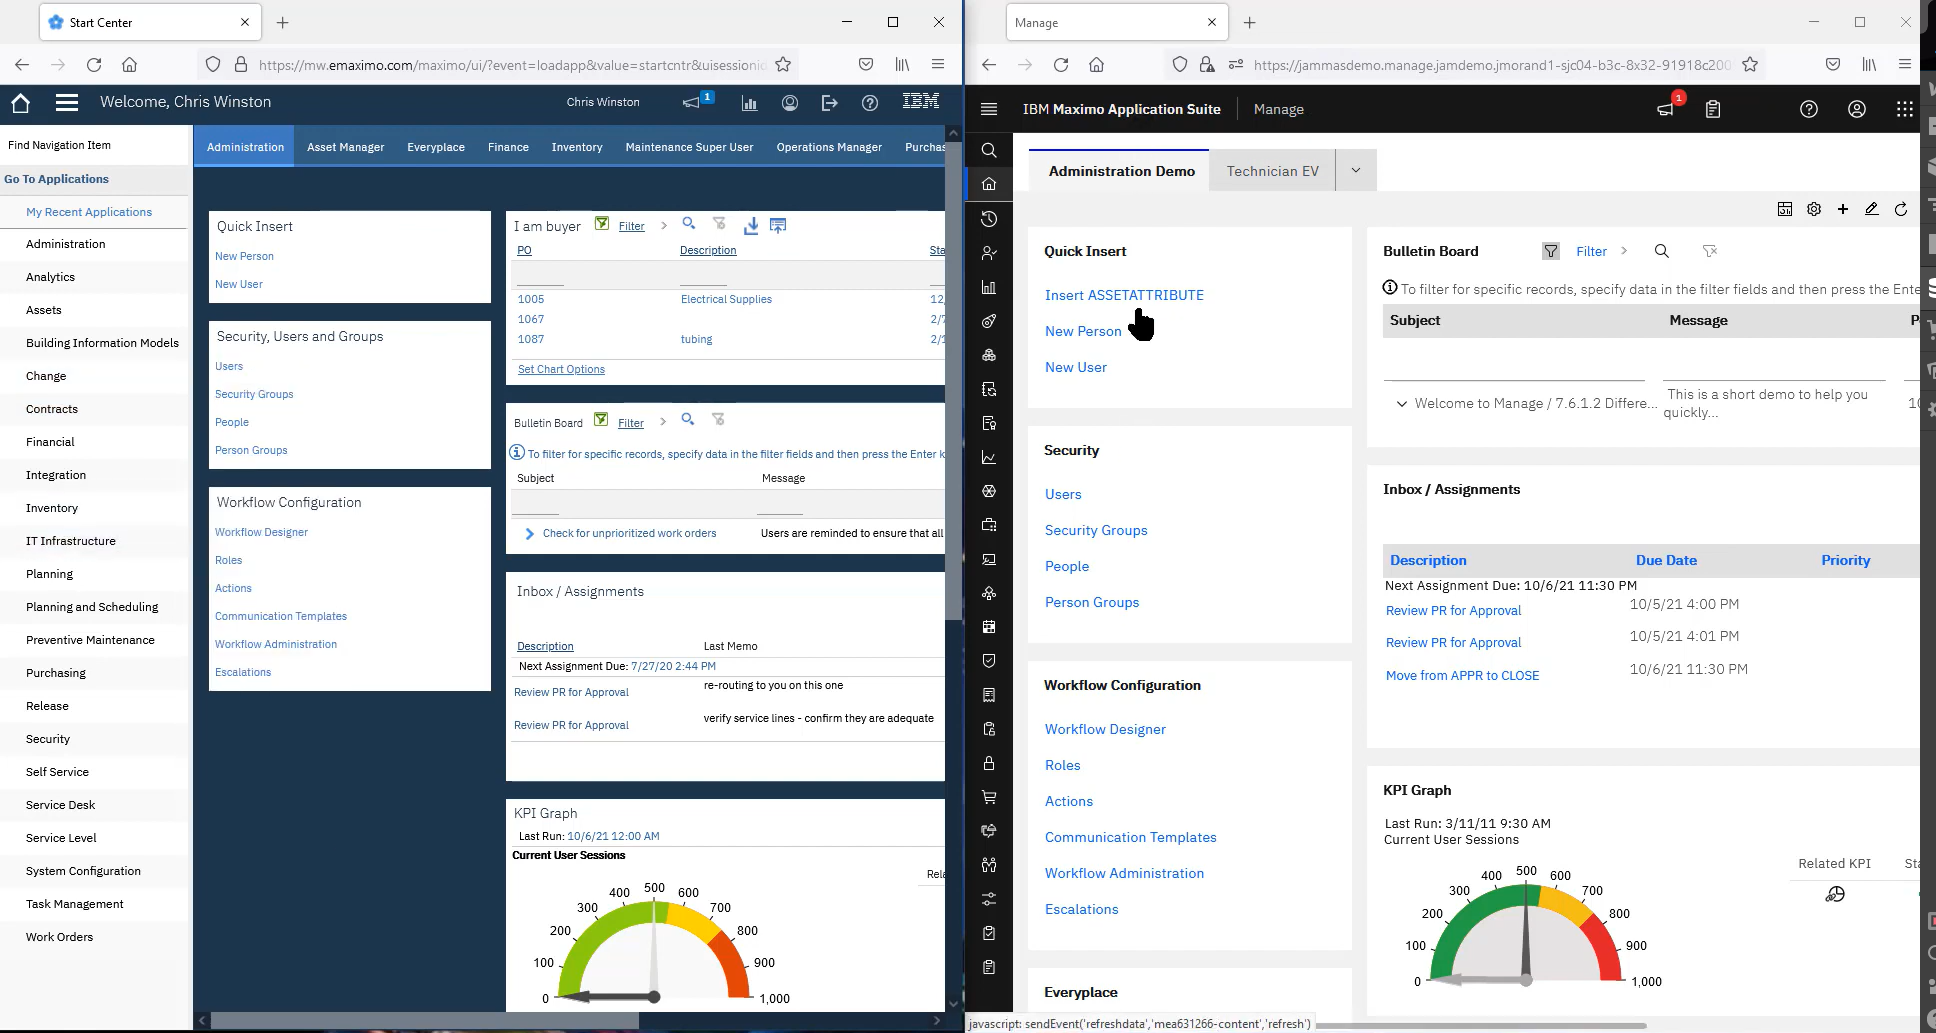
To the Maximo 7.6.x user, differences can appear stark and perhaps overwhelming. They are, until you understand the base level changes and then you can apply them throughout, and quickly get acclimated to Manage. Let’s look at them by key area of the application.

Colors and Spacing

Colors have changed and generally provide a bit more contrast overall, and they have also been used for emphasis for certain elements. The traditional yes/no checkbox is now a toggle that will be a bright Green when yes; Action buttons (‘Actions’, ‘Select…’, etc.) within application tabs, (as well as start center portlet designer) are a bright Blue for emphasis, making them easier to spot, and these Action buttons have also been used to create a menu that will consolidate what were individual buttons, usually freeing up 1 screen row of buttons on a sub-tab. These will generally be to the right, as opposed to the individual buttons that were on the left, so look for them.

One other spacing note: when your browser is not maximized on your screen, icons/menus/etc., that would be cut off, will likely be available. The designers have tried to provide access to controls that would normally be hidden when your screen is not maximized width-wise; vertically, there will still be challenges.
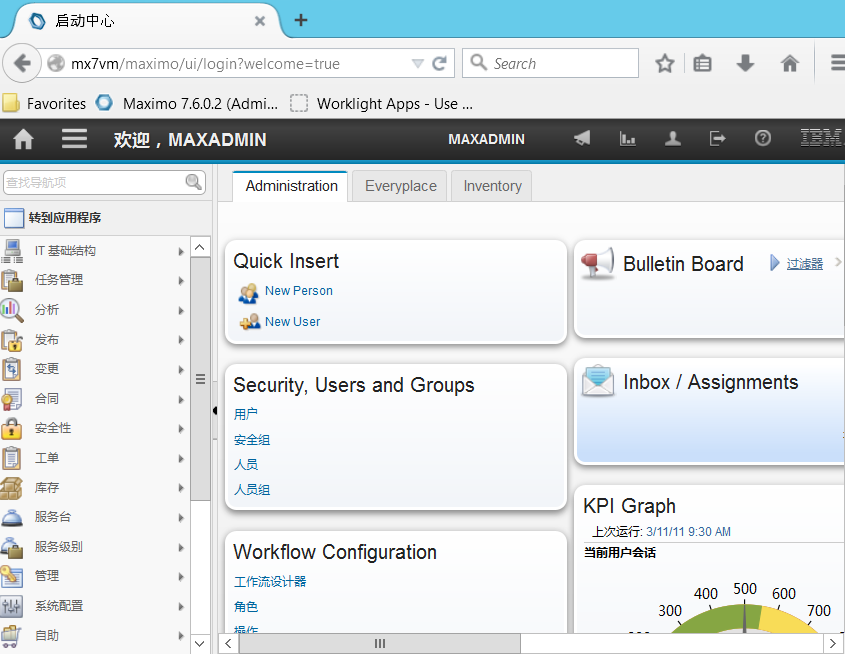
Start Center

Each portlet type is still there, so if you upgrade, they will upgrade. If you are starting anew, you generally build them the same way, but keep in mind the buttons have moved. OK and Finished have the new Blue for emphasis, but they are now to the right instead of the left. Colors are shaded a little differently, so red will look different, but it is still red, and so on.

Application Breadcrumbs

Virtually no change at all. Still in the same place (top, left side) with one cosmetic difference. Let’s say you hyperlink from Work Order Tracking to Assets to Locations. When you get to Locations, ‘Locations’ will just be the application title, but it will no longer be in the Breadcrumb listing (it was not actionable anyway since you are already in the application).

Navigation

The list of modules and the cascading list of applications is still there, but the list of applications will cascade down, instead of to the right. Further, the list compresses to a vertical ribbon the height of the browser tab and is always there, except when you hyperlink to another application. The ‘Find Navigation Item’ now appears in 2 places and searches differently. Within an application, it will just search what is accessible in the application; from the start center, it will work as it has in the past, searching through all of Maximo that the users can access.

Application List Tab

The list tab has numerous subtle differences:

  • Toolbar (buttons), Quick Key Search, Search Menu Bar, and Find Icon/Menu (magnifying glass icon) have been somewhat consolidated, moved up and are now right justified. Quick Key Search is hidden until you click the magnifying glass.
  • Queries are available on left as normal, and there is a new Query drop-down icon to display the list. This visibility is regulated by system property (mxe.webclient.ShowQueriesInToolbar).
  • Controls bar elements are disbursed
  • Icons for refresh, filter toggle, download, and show/hide have moved to the upper right, just below the toolbar.
  • Counter display area (1 to 20 of x) has moved to lower left; VCR buttons for next and previous have moved to lower right. You will often need to scroll down to get to them.

Application Main / Other tabs

Tab breadcrumbs (titles) will appear once you display the main tab. Vertical labels system property is no longer available; labels will now only appear above the data field, all the time. The typical exception for most ‘Description’ fields, will continue to be unlabeled. Checkbox becomes a toggle / slider depending on how you look at it; to the left for off and to the right for on (on will also be green).

Further, there is a video available in the MORE community with some side-by-side comparisons to help you in your journey to Manage. It is less than 20 minutes long, and you do not need to be a member to view it. 

Maximo Anywhere 7.6.4 SAML SSO

 Enterprise SSO Implementation is one of the key organisation level initiative since 2020. Over the last couple of years organisation are pushing towards SSO more and more and I can think of the following reasons for it:

  1. I believe this is driven by acquired awareness among organisations around cyber security threats.
  2. The cyber security has become more important as WFH became the new normal and organisation are more vulnerable to cyber attacks with employees using internet to access sensitive information.
  3. Data is the new age gold. If you lose your data then you lose your customers. Cyber attacks are more inclined towards data breach now.
  4. SSO comes with many perks like one centralised credential storage system which it makes it easier to plan, monitor and avoid cyber attacks.
  5. Organizations can force employees to use 2-factor authentication thereby giving one more layer of security.

With SSO becoming organisational goal, thus implementing the same for Maximo has become one of the most common and high priority item. SSO using SAML tokens is the most common type of SSO implementation in the recent times. @IBM has done a great job in enabling Maximo web application with SAML SSO. SAML based SSO implementation can be smoothly implemented. This Link is one of the resource.

But the same is not true for Maximo Anywhere 7.6.4( or previous versions). IBM has clearly said that Anywhere 764 does not support SAML SSO and this will be implemented in future version of Anywhere 7.6.4. Here is an official link to IBM's statement. This link also informs that IBM can provide sample code to implement SAML SSO for Anywhere 7.6.4 but implementation is not supported.

I have recently completed the SAML SSO implementation for Anywhere 7.6.4. Implementation is much easier than 7.6.3.1 which I did in 2020.

I cannot share the code as it is BPD Zenith's IP. I can still help with below information which might help you to achieve this implementation:

  1. IBM's App store app have issues with the Cookie master plugin and also, you cannot debug the app store app thus first thing to do is to install Maximo Anywhere container. This has other implications like you need to work with client to implement some kind of MDM solution. If client does not have a MDM solution and you are looking for some kind of solution close enough to IBM Mobile First application center then please reach out to me.
  2. Raise a Case with IBM to request for the sample code for Anywhere 7.6.4's SAML SSO implementation. It comes with a document which informs you about the XMLs to change and same code for SSOHandler class. Follow the instructions, provided in the SAML documentation which will help in achieving most changes required.
  3. The only class that need to be changes is the SSO handler Class. SSO handler class will have 2 logic implementation: 1st is the logic to open InAppbrowser and 2nd is the cookie master.
  4. Sample InAppbrowser code:

cordova.InAppBrowser.open('http://apache.org', '_blank', 'location=yes');

In Appbrowser code is important as it opens a browser session inside the app where users can login to SSO provider portal and fetch SAML token.

5. The cookie master plugin given with anywhere application center has couple of typos which needs to be corrected. Once the typos in the cookies master plugin JS class is corrected then build the Native app and run a test.

6. If you run into issue, first thing to check if the cookie master logic is capturing the userid and jsessionid properly.

IBM Readme for IBM Maximo Asset Management 7.6.1.3 Fix Pack

  Fix Readme Abstract This fix pack updates IBM® Maximo® Asset Management version 7.6.1, 7.6.1.1, and 7.6.1.2 Content IBM Maximo Asset Manag...